
Self-host K3s on Hetzner Cloud with Terraform: Under $25/month Production Kubernetes

Self-host K3s on Hetzner Cloud with Terraform: Under $25/month Production Kubernetes
Managed Kubernetes costs 5-10x what raw compute costs. You’re paying for someone else to run kubectl for you.
After pricing out a basic cluster on AWS and GKE—a few private services, a couple public endpoints, nothing exotic—the estimates landed north of $200/month before traffic costs. That moved managed Kubernetes out of my budget immediately. So I built the stack myself on Hetzner Cloud. Here’s the exact setup.
This guide gets you a production-ready K8s cluster on Hetzner Cloud for under $25/month. You’ll own every layer—compute, networking, storage, ingress. Spin up a private music server, self-hosted cloud storage, a side project API—whatever you want, whenever you want, no permission required. No vendor lock-in. No surprise bills.
Difficult Easy – Time to deploy ~20 minutes
Init
What You Need
# Install everything via Homebrew (MacOS/Linux/WSL)
brew install terraform kubectl k9s hcloud packer coreutils
Hetzner Cloud account — Login/Sign-up here
Terminal fluency — You live here now
20 minutes — That’s it
The ZipOps newsletter publishes the next articles in this series: TLS automation, observability stack, and deploying real applications. No spam, just infrastructure guides for developers who'd rather own their stack.
Get Your API Key
Hetzner needs to trust your Terraform commands. Create a project in Hetzner Cloud Console, go to Security > API Tokens, generate a token with Read & Write permissions.

This key is root access to your cloud. Treat it like a password.
Build Base Images
Hetzner spins up nodes from snapshots. This script creates them—a temporary VM builds the OS image, then self-destructs. Takes ~6 minutes. Costs pennies.
Bash cli
tmp_script=$(mktemp) && \
curl -sSL -o "${tmp_script}" https://raw.githubusercontent.com/kube-hetzner/terraform-hcloud-kube-hetzner/master/scripts/create.sh && \
chmod +x "${tmp_script}" && \
"${tmp_script}" && \
rm "${tmp_script}"
Fish cli
set tmp_script (mktemp) && \
curl -sSL -o "$tmp_script" https://raw.githubusercontent.com/kube-hetzner/terraform-hcloud-kube-hetzner/master/scripts/create.sh;
chmod +x "$tmp_script" && \
bash "$tmp_script" && \
rm "$tmp_script"
Expected output
==> Builds finished. The artifacts of successful builds are:
--> hcloud.microos-x86-snapshot: 'OpenSUSE MicroOS x86 by Kube-Hetzner' (ID: *********)
--> hcloud.microos-arm-snapshot: 'OpenSUSE MicroOS ARM by Kube-Hetzner' (ID: *********)
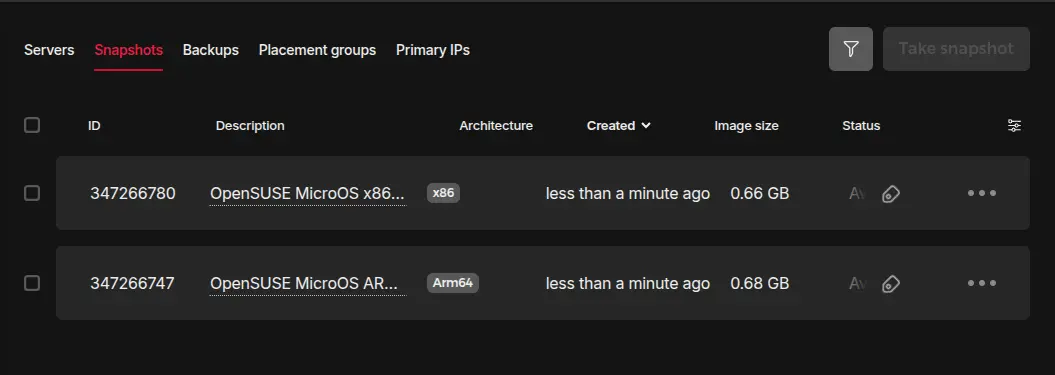
Sometimes selected VM tier are not available anymore, or it's not available in predefined cluster location. After the process completed, double check Server --> Snapshot and make sure you have exactly 2 images:
- OpenSUSE MicroOS x86 by Kube-Hetzner
- OpenSUSE MicroOS ARM by Kube-Hetzner
If something is missing, update kube.tf as well as hcloud-microos-snapshots.pkr.hcl updating location and/or server_type with actually valid values and run the same script again.
If process completed successfully and you have both snapshots in your project, safe delete temporary files
rm hcloud-microos-snapshots.pkr.hcl kube.tf